Only in the world of motorcycles does one constantly need to be on the defensive. Harley people have garnered a reputation over the years of being snobs. I suppose I never really met any Harley people over the years except my immediate family, so I was not aware the problem even existed!
For some reason, if you ride a motorcycle, you are expected to know every single bearing in each race in the motor. If you have not memorized the torque pattern for the allen bolts on the primary case you are stupid. What strikes me as odd, is that no one expects the same level of commitment from car owners. I suppose that is a consequence of cars being a daily necessity, but still. Most car owners would not know where their oil dipsticks were.
And yet when I realized I didn't know where my bike's drain plug was, I felt stupid.
In other hobbies I have, the idea of two groups has always existed. There are those who are super dedicated, build their own PCs, maintain everything themselves and find cost effective (i.e. bootlegging) ways to own games. They would never take it to a shop nor would they buy a premade computer. That would be silly and is only something stupid people would do.
It's not difficult to spot this same idea over and over again within many subcultures. Something that people often forget is that the larger audience is what allows them to enjoy their hobby. Because a company like Intel makes chips for large, bulk orders that will be sold to a variety of consumers; the hobbyist is able to take advantage of the individual processor sales. Because Asus makes the bulk of its money selling to manufacturers for distribution they can afford to have a niche market that caters to hobbyists who want a top of the line gaming experience.
Often, the hobbyist tends to forget that without the masses also enjoying the product, that the manufacturers might not exist. If a hobbyist only needs the services of a company once every 5 years but the average consumer needs the services every year, who is keeping that company in business? Who is helping them recoup R&D costs? Who is paying their employees?
This whole concept usually revolves around men wanting to feel special in some way. I've seen it time and time again. I suppose it boils down in some ways to insecurity. People want to feel like they have something special and that their skills are unique only to them.
To be sure, the idea of being a special snowflake is not limited to kids on the internet. Many grown men feel they need to be that way. The electric start motorcycle has been around with Harley since 1965. 1965! Yet if you ask someone who rides a kickstarted motorcycle, they will tell you how bad it is and that what they have is unique. Further they will tell you that real bikes are kickstarted and electric is some new idea that is for the casual motorcyclist. What kind of insanity is that? The first hydraulic front end in a Harley was in 1949. Yet, most people who prefer springer front ends on the old bikes will tell you that springs were the best and this hydraulic stuff is for the casuals. They choose to act as if advancements were never made, and technology does not exist. Strangely, these same people seem to prefer modern medicine, grocery stores, phones in their pockets and so on. Technologies of necessity do not make them feel special and therefore do not matter as much.
Wasn't it Henry Ford who said 'If I would have asked my customer what they wanted, they would have said, "a faster horse"'. I'm paraphrasing of course, but the point is clear.
Most of these people weren't even born at the time, yet they discuss these ideas like they are the end all and THEY ALONE are the keepers of the finest technology and skills. They speak from a place of false nostalgia, which can be very dangerous.
What they do not realize is that if there was not a casual audience, if there was not a set of people who disagreed, if there was not a set of people that did not insist that year "X" was the best year ever and the technology should not have changed, then there would be no hardcore market.
For the hobbyist and aftermarket platform to exist at all, the brand must be strong. Companies cannot take on the costs and risks of catering to a demographic who insists that nothing is broken when it sits in pieces. Without its audience, Harley would not have survived at all. If all that everyone bought was one Harley bike every 30 years, they would cease to exist.
I cannot figure out, for the life of me, why these demographics insist on being special. I suppose everyone wants something unique. Everyone wants to feel different. Possibly because I realize I am not unique nor different helps me to sit back and look at the big picture.
Frankly, this whole rant does come from a place of insecurity as well. It would be misleading for me to say that I don't want more knowledge about mechanics. For all I know (which is, surprisingly, a lot), I don't know. I do not possess the confidence to work on my own bike, by myself. I could take it apart and name everything that comes off of it, but I am not confident to put it together again.
If you're still reading, you probably have some questions. "Why is he complaining about this? Who cares? Why are you so upset? Why this rant?". Well, I can try and explain.
As of now, the bike has some issues. None are major but are issues nonetheless. The front cylinder head has a small oil leak around the gasket, the primary case has a small oil leak on the gasket and the front brakes are about done.
I can handle the brakes, I can handle the primary gasket...but I am apprehensive about changing the head gasket myself. There are many things to remove and many steps to account for in the process and I am terrified of making a mistake. Of course, when I mentioned I was going to take the head gasket job to the dealer for service I was met with criticism. "Why bring it there!? You should work on your bike yourself! I wouldn't need to do that! You're not a real rider unless you do all your own work! Just another casual motorcyclist who doesn't want to get his hands dirty!".
But my ignorance and confidence deficit will allow me to pay that dealer for work, who can in turn keep existing to service the needs of riders, which will also pay a good salary to a mechanic. In the long run, people like me who will need to use the dealership will ensure the most extreme hobbyists the security of numerous aftermarket as well as factory parts and modifications. They will ensure the brand stays around in general because really, if no one knows what a Harley is, then you aren't the special snowflake you thought you were. Without recognition, you're just some guy with some bike.

03 Road King Police: A Harley Davidson Adventure
Tuesday, April 12, 2016
Sunday, April 3, 2016
I'm done? I'm done! I'm not done.
The passing of Easter marked the last real riding day. The temperature that day reached into the mid 70's, something we have not experienced since. Even when it has risen above 40 degrees, we have been treated to nothing but endless rain and storms. To mark the first few days of April, the weather patterns have seen fit to dump 2 inches of snow on us. Needless to say the bike has not moved from the garage for awhile. With another 2 inches predicted tonight, it is highly unlikely that next week will provide any opportunity for a ride.
 |
| This is where the motorcycles sleep. |
We recently replaced the garage door on our house and installed an automatic opener. Because of the ease of use, we have been using the garage as our main point of entry and egress. Unfortunately, that means we are greeted in the morning and evening by both bikes, sitting motionless, in the cold garage. With all this time to stare at the bike, I usually begin to look to accessorize and change out items on the bike that really don't need it.
I believe that I am in the literal 'bells and whistles' phase of the bike perfection process. A bit frightening to be sure, as usually this is followed by the 'let's sell it and start again' phase. Although I have no intention of selling, I do constantly look for ways to spend money like a fool.
 |
| You can buy literal bells for your bike. Keep those gremlins away! |
I have been browsing the depths of the harley touring accessories on EBay for while now. Among the items I thought about buying were engine guard chaps, saddlebag liners and a 4-point docking system. Do I need any of this? No. But not being able to ride fills me with anticipation which causes the mind to do some strange things.
For the most part I have strayed away or at least closed the webpage before committing any funds to the product but I have bitten some bullets for better or worse. Here are the top useless things I have added to the bike in a desperate attempt the bring it to completion and satisfy my obsession,
 |
| I didn't buy them...yet. |
I have rated these items in my own way along with some experiences I had.
Axle Nut Caps $15 from China Surprise of the Quality 9/10
Most bikes I have seen have some form of cap on the nuts that hold the front axle in place. There are a huge range of designs but as usual, simple and clean is my preference. After looking at all the options I decided that this part could be cheap. Harley sells some attractive options, but they clock in at anywhere from $30 to $50. I could not justify that much for a cosmetic item.
 |
| Cleaning up that exposed nut. |
I turned to everyone's favorite bootleg seller, EBay and was quickly flooded with cheap options. I took the chance and ordered a set of black caps from a seller in China (as most are) for $15. After waiting for about 2 weeks to arrive, I was shocked at how good they feel. The steel they use is thick and heavy and the set screws went into place with ease. They added a bit of class to the forks without breaking the bank. 10/10 would buy again.
 |
| The "Harley" logo, as imagined by a company in Hong Kong. |
French Ring/Light Visor $~70 Makes the headlight look less stupid 10/10
 |
| Yeah, it stuck out a bit. |
This was actually a long endured struggle. When we first decided to change out the whole light system for LEDs we had assumed that everything would fit and line up in the old places perfectly. For the most part, that was accurate save for the headlight. Although the headlight fit perfectly in the nacelle it was definitely longer. Like, really long. It stuck out beyond the stock beauty ring to the point where it just looked bad.
My uncle realized it and decided to buy a ring with a visor that would cover up this protrusion. The issue was that he bought the wrong size ring in the wrong finish. We attempted, for 2 weeks, to fix this problem and make it work. Alas, our efforts were for naught, we had to stop.
 |
| Money might not buy happiness, but it does buy good looks. |
The style was correct, we just needed the right type. I hit EBay and found a dealer take-off, gloss black powdercoated ring that would be perfect. I spent the absurd amount of money, performed the easiest installation ever and then admired the beauty. It was worth it, although now the passing lamps look like they could use the hoods as well.
Chrome License Plate screws with Black "Crystal" $10 Fanciness 7/10
Sometimes the most subtle changes have the largest impact on the way a bike looks. From behind, the bike was already looking great, except the license plate.
I didn't mind the plate itself, but rather the hardware. When the bike was delivered, the creepy asshole who sold it to me, decided to remove the old plate. No problem....except he felt it necessary to also take the screws holding the plate. Luckily my uncle came through as always with fresh hardware, but it was one of many small incidents that made me really regret giving that man my money.
 |
| They blend perfectly with the look. |
The two screws my uncle gave me were brass in color, completely clashing with everything on the back of the bike. I hit EBay hard and found tons of decorative screws. I settled with the chrome and black to add to the look of the bike. All in all I am very happy with the look.
 |
| Totally real, not at all fake, authentic crystals. |
EKLIPES Charging System $ Free because of Refund. 10/10 Worst Purchase Ever
I'm a bit of a technology nut. Every room in the house must have a screen and I require massive amounts of power outlets. It is my goal to make sure no matter where you are, you will have a screen and a charging port. I brought the same idea to the bike, wanting to make sure I could power my phone and IPod. I found this charger on Amazon, which appeared to do what I needed it to. Foolishly, I added it to cart without checking reviews.
 |
| Nope. Nope. Nope. Nope. Nope. Nope. |
Installation was somewhat painful, I had to cut and splice wires to fit it through the tank's small opening for wires. Installing the unit was interesting. It felt cheap and not very secure. I figured it would work like normal though, despite the feeling I wasted my money on some cheap piece of crap.
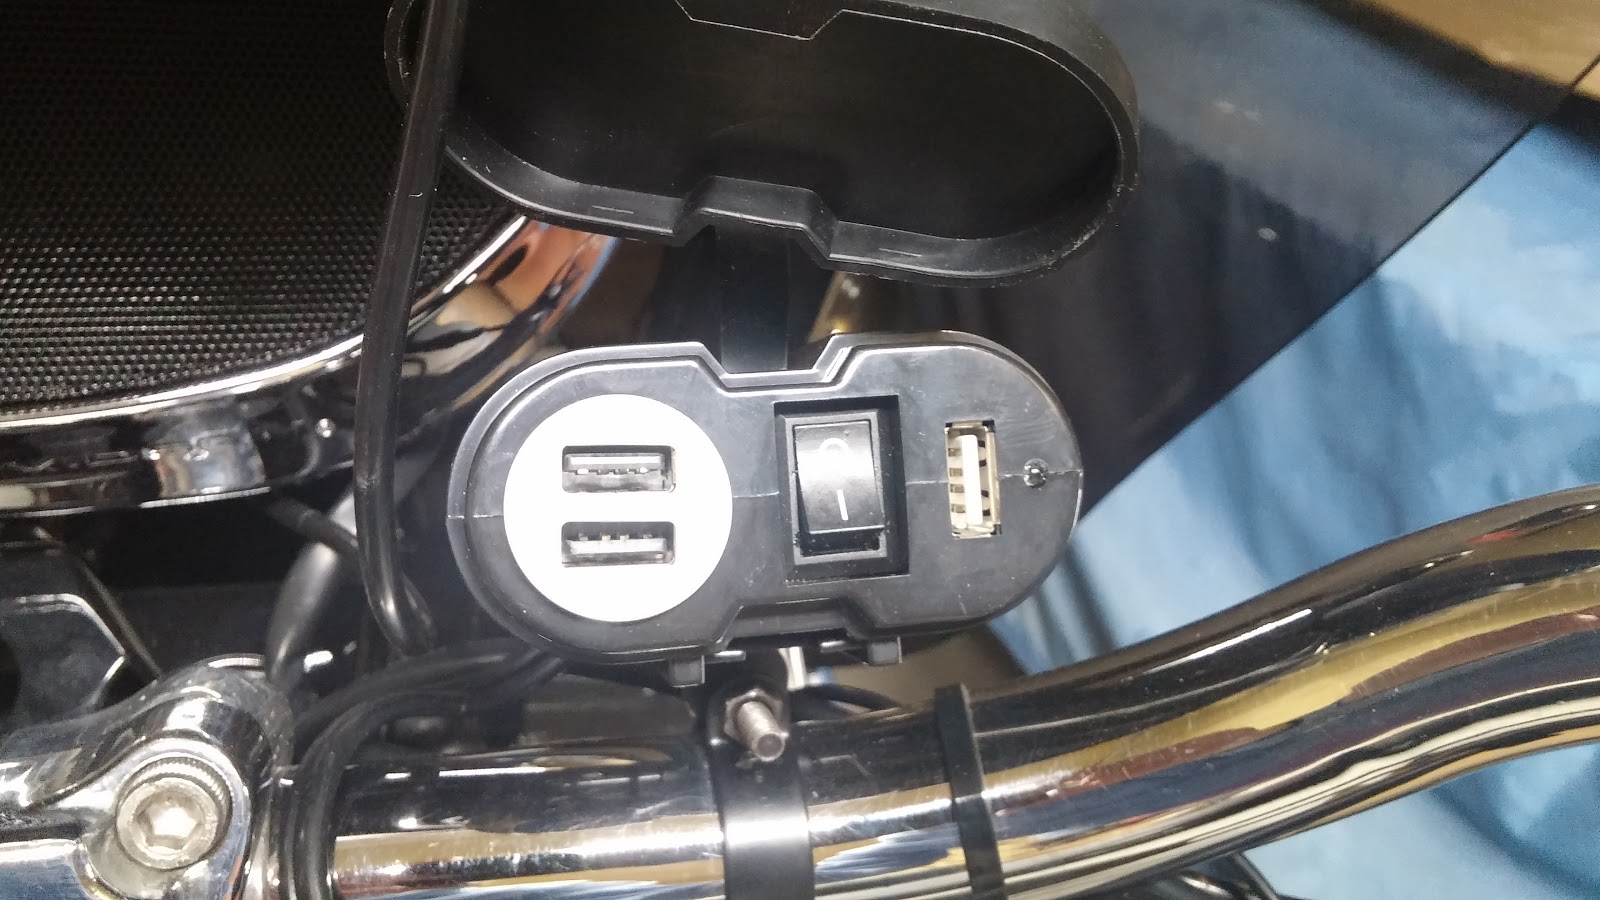 |
| Nope. Nope. Please do not buy this. |
As soon as I turned it on there were problems. My speakers were getting major interference. Any cable that I used was not charging properly. The antenna on the IPod would not get a signal or would lose it quickly. I came to realize that the unit itself had no shielding. I then started to read reviews. Most of them discussed how it would melt or destroy whatever they plugged in. For me, it was too late. I quickly realized the charger destroyed my IPod. Luckily it did not get my phone or I would have been terribly angry. Amazon refunded my money, but I ate the IPod cost. Buyer beware. Please do not give this company any money. Spend the $70 on a reputable charger instead. I wish I did.
There's always more!
Rest assured, I will find more things to put on the bike eventually. After the horrible experience with the charger, I think I need a break from accessories. I am still in the hole with the IPod being fried. The solution to the charger dilemma, at least that I found, was to buy a portable power source. I bought a huge power bank from a company called Kmashi that should be able to charge my phone around 5 times with ease. I have been testing it for a week now and will most likely review it when I have a moment.
I also tested out a camera I received with a video game I bought last year. This 'gopro junior' as it seems, can handle some very nice video quality. I made a test video, strapping the camera to the crash bar and using both YouTube and the bundled software. Feel free to check it out. Once this weather clears I intend to do much more.
At this point, I just hope to see a day in the 70's again.
 |
| The sun glistens off the pipes. The sun is something we have not seen in 2 weeks. |
Poorly made and edited video here: https://www.youtube.com/watch?v=bIoSymoy1eg
Monday, March 28, 2016
Nostalgia and Inherited Design: My Fishtail Obsession Fulfilled
It's been a little more than two years since my Dad passed away and only around six months since I sold the last of his excess vehicles. The empty driveway and garage have become sobering reminders of the fragile lives we all lead. What becomes painful to realize is that everything we acquire during our lives will slowly be sold off or thrown away when we pass on. The most beneficial way to collect junk is to do so with junk that will hold value. There is no doubt that this is what Dad did for us and I am very grateful.
Aside from his larger possessions, Dad didn't keep much junk around the house. Every room in the house, save for the basement, was pretty void of needless possessions. There was no newspaper collection or room packed with empty boxes, but rather just some personal effects that had been left over. In each room we found some magazines from the 60's and 70's along with small items like belt buckles or old stamps. All in all, we filled less than 2 boxes full of items.
 |
| Nothing really changes. |
I think that things like catalogues and sales ads provide an interesting blast of nostalgia to everyone. It's always fun when someone online posts an old sales ad from Toys r Us or Best Buy that really illustrate the trends at the time and what looked like very low prices. Buried within Dad's repair and service manuals was a catalogue for Harley Davidson from 1963. Within its pages are tons of accessories for not only the bike but the rider as well.
A few things are interesting about this particular catalogue. First, the marketing arm of Harley Davidson really has not changed all that much in the 50+ years since this catalogue came out. The words "power" and "owning the road" appear here as frequently as they do on the modern website.
The next thing I noticed was the styling. Almost every item in this book focuses on the styling of the bike itself. Like any good accessory maker, Harley has always been a reflection of the values of the time. In this case, everything was a rocket ship.
 |
| To the moon! |
The whole idea of the "streamline" design, or making something appear in motion without it actually being in motion, dates back to the late 30's and early 40's when Harley introduced the "EL" or "Knucklehead" bike. The pulled back design of the bike is one that endures and inspires to this day. As the space race was becoming a thing in the 50's, the rocket ship theme became etched into the design of cars and bikes. This was clearly reflected by the continued and refined use of the "fishtail" exhaust.
The catalogue offers numerous styles of exhaust systems, of which two stand out the most. The fishtail style they offer along with the megaphone system both reflect their time perfectly. They look as though they are about to take off. Digging further into this catalogue shows the same streamline, "blast off" style repeated over and over again.
 |
| Even the saddlebags and seats are ready for blast off. |
For some reason this style always appealed to me. Growing up with Dad's 1960 bike imprinted an enduring love for the fishtail design on me. One of the earliest memories I have is my mom holding my hand while she pointed out the fishtail exhaust on the bike before we took one of our once a year trips. These are special to me and was a feature I was looking forward to on my own bike.
The aftermarket dilemma
As mentioned previously in this blog, I replaced the stock mufflers on my bike with a set of Kerker supertrapp mufflers. I really enjoy the sound these mufflers produce. Loud enough to be heard and seen, but not obnoxious. One benefit to these mufflers was that they had removable exhaust tips. Changing to a different tip would be no problem!
...Or so I thought. Aftermarket accessory makers come and go quickly. In a highly competitive field filled with cheap chinese knock-off products, it is not difficult to see why. Kerker itself was bought out by a local company which now only sells one type of muffler with the Kerker branding. Needless to say my desired fishtail exhaust tips were no longer available.
 |
| They still exist...barely. |
After trolling EBay for about a month solid I finally came back with a positive hit! A guy was selling his used exhaust system on EBay which included fishtail tips! There was just one problem. These pipes were meant for a heritage springer and not a road king. If only he were just selling the tips! I did not want to pay the $100 asking price plus $60 shipping for pipes I didn't need and couldn't use.
 |
| The original slash cut tips. Also a great look! |
Patiently I waited for about two weeks, watching this auction. When it became clear that no one wanted these used pipes I emailed the seller with a proposition. He agreed to sell the tips only for $50 plus $10 shipping. I was very pleased. I sent him the money and waited....and waited....and finally, today, they arrived! Time to put 'em on!
They are used, after all.
 |
| Not too bad, but lots of pitted rust. |
Upon arrival my initial inspection of the tips revealed a common problem; surface rust. There was a fair amount of it, but it was nothing terribly bad. I went to the garage to size them up against the current tips. I simply assumed that they would fit without actually knowing. Really, I took a $60 gamble.
 |
| Removing the carbon on the inner ring for a better fit was a dirty job. |
Luckily it paid off and it was clear they would fit perfectly! My wife and I grabbed some old bumper polish and hit the shop in the basement to clean up the tails!
The amount of surface rust was quickly rubbed out and a fair amount of polish and elbow grease assured these old classics were brought back to a glimmer! It took us around 40 minutes to fully clean and buff the tips and I'm sure you'll agree it was worth it!
 |
| I can't wait to get them on! |
Installation was surprisingly easy. It would have been a smart move to remove the saddlebags before removing the tips, but I did not have time for rational solutions. Each tip is held by three allen head screws. One on the top (hence saddlebag removal) and one on each side that sits at an angle. Fortunately, all of the screws broke loose with ease allowing me to quickly remove the slash cut tips.
 |
| The allen head screw that was most difficult to get to. |
Placing the tips took a bit more effort. The left side went on with ease, requiring no modifications or frustration. Each screw found its way back into the hole and threaded with ease.
 |
| The exposed packing of the muffler. |
The right side took a bit longer than anticipated. The tip itself did not want to slide on. Despite everything being identical, for whatever reason it simply would not go. I decided it would need some persuading to work properly. I found a 2x4 piece of wood and a solid hammer.
 |
| A wood block and a persuader. |
Using these tools I gently, but thoroughly hit the hammer into the block of wood against the fishtail. After two hits the tail slipped into place allowing me to insert the screws.
 |
| Don't forget the loctite or you'll lose parts! |
The two side screws were easy. I applied blue loctite to the screws and ran them in. The final top screw would not line up. I removed the saddlebag and after much fidgeting, I was able to get the screw to line up. All in all the job took about 25 minutes.
I'm very pleased with the way they look. The bike is classic enough where they do not look out of place and actually add some much needed chrome to the rear. Although they do not sound as good as I had hoped, they still have their own unique whine. I can't wait to hit the road and give them a real test!
 |
| Can't wait to see it in sunlight! |
The Personal Touch
The other day I was watching a video on YouTube of a mechanic who works for a Polaris dealership. Each of his blogs usually involve him doing one of two things; either test riding a brand new trade in or taking a longer trip where he rambles on in a motovlog format. I find both to be pretty entertaining and they have definitely taught me a fair amount of differences between makes and models.
One vlog in particular amused me a bit. They had just taken a lower end Harley in for trade so he decided to take it for a test ride. When he pulled back up to the dealership, one of his co-workers was waiting outside. They looked at the bike for a bit, admiring it's clean glimmer before noticing some stickers. The other employee remarked that it wouldn't be a Harley without skull stickers. The vlogger replied back in jest that each skull on a Harley adds 2 horsepower. I had a good chuckle about this.
If you search EBay or go to any of the major aftermarket suppliers you will quickly notice the obsession with the skull motif. There are loads upon loads of accessories and accents that employ the skull in any location imaginable. I didn't realize that it was so popular that it became a parody unto itself.
But that is OK. To each their own. If someone enjoys the skull motif, why not do it? There is certainly a demand for this style of trim. Adding this bit of style to the bike is someone's way of personalizing it. Just because I don't care for it, doesn't mean its stupid.
Everyone has their own idea. I've seen some people insist everything be stock. I've seen some who put brown on black and I've even seen some who think dragons and octopuses airbrushed onto the gas tanks are cool.
You put those on a Harley?
I know it's hard to believe, but as a 30 something year-old male on the internet, I have grown up around videogames. From the early days on the Nintendo Entertainment System to the current generation of PS4, WiiU and Xbox One I have spent a stupid amount of time and money on video games. I wanted to add a small personal touch the bike that would reflect the other part of me that has been so important over the years.
Trying to find the right thing to put on the bike was difficult. I knew whatever I put on it would have to be a vinyl decal. I also knew that the back of the saddlebags was the best location. I wanted whatever I chose to put on the bike to be subdued and blend seamlessly with the structure around it. If I wanted something loud I would have painted the bike.
For awhile I wanted to go with one of the Metal Gear Solid Fox Hound logos. There are lot's to choose from and it was one of the first games I remember hating on the old NES. Oddly, it's a series that became better over time and really was one of the first series my wife and I played through together. Nostalgia alone almost sold me.
But there were so many other games. If you head over to Etsy, a store for handmade goods, there is practically no limit as to the decals you will find. I spent a ton of late evenings browsing through pages upon pages of decals, never finding anything I liked.
I'm not sure how but I must have seen something on a Google image search that led me to the Smash Bros. series. This long running franchise pulls characters from all over the Nintendo universe along with numerous 3rd party franchises (including Metal Gear!). This would be perfect. I could have representation from my favorite series in their most minimalist forms. Each series is assigned an icon that reflects an important symbol from the series. These symbols appear as a silhouette behind each character. They would be ideal!
The most useful aspect of Etsy is that many of the sellers will do custom work if you ask. I emailed the lady who ran the shop and asked if she would be willing to do a custom order. She agreed and quickly made and shipped the order. Here is how we applied and measured them.
You only get one chance!
The decals themselves are printed or cut onto clear contact paper using black ink. You can request other colors but black worked best for my bags. A grid paper is then placed on top of the image in order to better align in.
We decided that the least invasive location for these decals would be the rear of the saddlebags around the guard rails. On the Road King Police models, the guards are an older style that leaves around a one inch gap visible on the rear of the bags.
I held the bike upright in place while my wife used a ruler and pencil to lightly draw a 1 inch by 1 inch line across the top and bottom of the rail gap. This line would serve as a guide, letting us know the visible area we could place decals on.
We removed the bags from the bike and brought them inside where we had more light. Once inside my wife slowly began the adhesion process. Removing the backs and sticking them on firmly and rubbing for around 1 minute each assured a solid bond. After each decal she would stop to space out the remaining images ensuring she did not go over or under.
The end result looks fantastic! It is subtle enough where it does not distract from the natural beauty of the bike but clean enough that those who see the symbols will recognize them. As always the black on white look maintains a classic, minimal look that is hard to beat. I'm excited I could add some personal touch to this project and find a creative way to merge my hobbies.
Etsy Store that made my decals - https://www.etsy.com/ca/shop/DesignbyCasey
YouTube Vlogger I enjoy - https://www.youtube.com/user/fzrsmkr
One vlog in particular amused me a bit. They had just taken a lower end Harley in for trade so he decided to take it for a test ride. When he pulled back up to the dealership, one of his co-workers was waiting outside. They looked at the bike for a bit, admiring it's clean glimmer before noticing some stickers. The other employee remarked that it wouldn't be a Harley without skull stickers. The vlogger replied back in jest that each skull on a Harley adds 2 horsepower. I had a good chuckle about this.
 |
| Over 25,000 ways to add more horsepower! |
But that is OK. To each their own. If someone enjoys the skull motif, why not do it? There is certainly a demand for this style of trim. Adding this bit of style to the bike is someone's way of personalizing it. Just because I don't care for it, doesn't mean its stupid.
Everyone has their own idea. I've seen some people insist everything be stock. I've seen some who put brown on black and I've even seen some who think dragons and octopuses airbrushed onto the gas tanks are cool.
You put those on a Harley?
I know it's hard to believe, but as a 30 something year-old male on the internet, I have grown up around videogames. From the early days on the Nintendo Entertainment System to the current generation of PS4, WiiU and Xbox One I have spent a stupid amount of time and money on video games. I wanted to add a small personal touch the bike that would reflect the other part of me that has been so important over the years.
Trying to find the right thing to put on the bike was difficult. I knew whatever I put on it would have to be a vinyl decal. I also knew that the back of the saddlebags was the best location. I wanted whatever I chose to put on the bike to be subdued and blend seamlessly with the structure around it. If I wanted something loud I would have painted the bike.
For awhile I wanted to go with one of the Metal Gear Solid Fox Hound logos. There are lot's to choose from and it was one of the first games I remember hating on the old NES. Oddly, it's a series that became better over time and really was one of the first series my wife and I played through together. Nostalgia alone almost sold me.
 |
| My first choice just was not working out. |
I'm not sure how but I must have seen something on a Google image search that led me to the Smash Bros. series. This long running franchise pulls characters from all over the Nintendo universe along with numerous 3rd party franchises (including Metal Gear!). This would be perfect. I could have representation from my favorite series in their most minimalist forms. Each series is assigned an icon that reflects an important symbol from the series. These symbols appear as a silhouette behind each character. They would be ideal!
| Perfect! |
You only get one chance!
The decals themselves are printed or cut onto clear contact paper using black ink. You can request other colors but black worked best for my bags. A grid paper is then placed on top of the image in order to better align in.
 |
| The classic rails of the police model provide the perfect frame! |
 |
| The bags and decals before application. |
 |
| Mario, Yoshi, Kirby, Pokemon, Animal Crossing, Pikmin |
We removed the bags from the bike and brought them inside where we had more light. Once inside my wife slowly began the adhesion process. Removing the backs and sticking them on firmly and rubbing for around 1 minute each assured a solid bond. After each decal she would stop to space out the remaining images ensuring she did not go over or under.
 |
| Zelda, Earthbound, Metal Gear Solid, Xenoblade, Sonic, Pac-Man |
 |
| Looking great! |
YouTube Vlogger I enjoy - https://www.youtube.com/user/fzrsmkr
Wednesday, March 23, 2016
On the Road Again
As per usual, the midwest cannot decide what weather it wants to wear this week. Like an indecisive person in a closet full of clothes, we have experienced low 70's, high winds, torrential rains, mid 50s and even snow. Needless to say, riding has been quite challenging despite it officially being spring.
We have finished the bulk of the work on the bike and it now sits comfortably in my recently cleaned and renovated garage. I ended up taking it home about 2 weeks ago in hopes I would have time and weather to ride. Although there are some other small changes to make, the bike is about where I want it to be. Perhaps it's time to sit back and discuss how the changes have affected how I ride and the performance of the bike.
It sounds like a bike
Perhaps the most noticeable difference was the sound of the bike. We replaced the stock mufflers with a set of Kerker branded pipes. The original plan was to completely replace the whole system, mufflers, headers and fuel pack but we ended up scrapping that idea in favor of lights.
I'm actually relieved I didn't spend the money on exhaust. The sound the Kerkers make is absolutely perfect. It manages to capture the deep hum at idle perfectly, reminding me of Dad's old Knucklehead. It manages to hum loud enough to be heard, but not too much to be obnoxious. I can't believe how well they worked out. I still intend to replace the header pipes eventually but the mufflers will stay regardless.
The most difficult aspect of dealing with the Kerker mufflers is that the company does not exist anymore. It was bought out by an Ohio company which still sells some parts and pipes under the Kerker name, but finding replacement baffles will be difficult. It has also made one of my biggest 'wants' on the list difficult to fulfill.
When I was a very small child, my dad, once a year, would take out his old 1960 Panhead from the garage and take me for a ride. Usually we would end up going to Taco Bell and getting lunch and then heading to a lake at the local park. It was a once a year event that I looked forward to. The bike has fishtail exhaust tips on the mufflers, which is one of the earliest memories I have. My mom was holding my hand outside in front of the garage. Dad rolled out the bike and kicked it over till it started and let it idle. Mom and Dad pointed out the fishy tails on the back of the bike to me. Needless to say, I was excited. To me, it was the coolest thing ever. Ever since then I have wanted fishtail exhaust on my bike.
This would not have been an issue except that Kerker no longer makes them. It was painful and slow but I finally managed to track down a pair of used tips that SHOULD and HOPEFULLY fit my exhaust. Now I play the waiting game.
Comfort for Less
After clocking in around 500 miles so far I can say, without doubt, that the air ride seat is one of the best setups I have ever ridden on. The seat responds to the road the same way the center post, spring loaded saddle seats from the past do. It bobs along with bumps and shifts in the pavement ensuring your spine and kidneys continue to function normally.
What amazes me is how many people do not want this seat. It's never difficult to find this seat on EBay for less than $200. I guess I will never understand the obsession with being cradled in the frame of the bike, sitting on less than 1" of padding while the road rearranges your internal organs. For less than the cost of most quality solo seats, why not use the air ride system? To each their own, I suppose.
The Buck Stops Here
The "buckhorn" style handlebars that currently sit on the bike were also a much welcomed improvement. The stock bars were by no means terrible, but there is no substitute for the comfort afforded by this style of handle bar. We installed a 3" riser sitting on top of the trees that used a very nice looking Harley bar clamp. The horns were then angled back to a comfortable position and the controls were installed and adjusted.
Essentially, my arms are able to rest on the grips while I hold them. They are much wider so my arms sit in a position that would be like sitting in an armchair. This is of course a matter of personal preference but it is the style that I am most accustomed to and the style most will use on their bikes.
Overall?
The bike has been far more comfortable to ride. My back and spine have thanked me ever since the weather broke. It was not difficult to cover 100 miles in one sitting without getting cramped up. The riding position I have now is more similar to the position that I prefered on the older bikes. I sit up higher, my arms rest at my side and I move on a cushion of air with the road. It feels great!
Anything Else?
A couple of things are still coming up. There have been some small additions that I will cover later. Most notably I added a terrible, terrible power port, stuck some decals on the saddlebags and threw on some axle caps. All minor changes but worth discussing nonetheless.
There will always be more. In the world of Motorcycles, there's always something to do!
We have finished the bulk of the work on the bike and it now sits comfortably in my recently cleaned and renovated garage. I ended up taking it home about 2 weeks ago in hopes I would have time and weather to ride. Although there are some other small changes to make, the bike is about where I want it to be. Perhaps it's time to sit back and discuss how the changes have affected how I ride and the performance of the bike.
It sounds like a bike
Perhaps the most noticeable difference was the sound of the bike. We replaced the stock mufflers with a set of Kerker branded pipes. The original plan was to completely replace the whole system, mufflers, headers and fuel pack but we ended up scrapping that idea in favor of lights.
I'm actually relieved I didn't spend the money on exhaust. The sound the Kerkers make is absolutely perfect. It manages to capture the deep hum at idle perfectly, reminding me of Dad's old Knucklehead. It manages to hum loud enough to be heard, but not too much to be obnoxious. I can't believe how well they worked out. I still intend to replace the header pipes eventually but the mufflers will stay regardless.
 |
| The 'slash cut' exhaust tips look great but can be dangerous if you're not watching out. |
When I was a very small child, my dad, once a year, would take out his old 1960 Panhead from the garage and take me for a ride. Usually we would end up going to Taco Bell and getting lunch and then heading to a lake at the local park. It was a once a year event that I looked forward to. The bike has fishtail exhaust tips on the mufflers, which is one of the earliest memories I have. My mom was holding my hand outside in front of the garage. Dad rolled out the bike and kicked it over till it started and let it idle. Mom and Dad pointed out the fishy tails on the back of the bike to me. Needless to say, I was excited. To me, it was the coolest thing ever. Ever since then I have wanted fishtail exhaust on my bike.
This would not have been an issue except that Kerker no longer makes them. It was painful and slow but I finally managed to track down a pair of used tips that SHOULD and HOPEFULLY fit my exhaust. Now I play the waiting game.
Comfort for Less
After clocking in around 500 miles so far I can say, without doubt, that the air ride seat is one of the best setups I have ever ridden on. The seat responds to the road the same way the center post, spring loaded saddle seats from the past do. It bobs along with bumps and shifts in the pavement ensuring your spine and kidneys continue to function normally.
 |
| I really, really like this seat. |
The Buck Stops Here
The "buckhorn" style handlebars that currently sit on the bike were also a much welcomed improvement. The stock bars were by no means terrible, but there is no substitute for the comfort afforded by this style of handle bar. We installed a 3" riser sitting on top of the trees that used a very nice looking Harley bar clamp. The horns were then angled back to a comfortable position and the controls were installed and adjusted.
Essentially, my arms are able to rest on the grips while I hold them. They are much wider so my arms sit in a position that would be like sitting in an armchair. This is of course a matter of personal preference but it is the style that I am most accustomed to and the style most will use on their bikes.
Overall?
The bike has been far more comfortable to ride. My back and spine have thanked me ever since the weather broke. It was not difficult to cover 100 miles in one sitting without getting cramped up. The riding position I have now is more similar to the position that I prefered on the older bikes. I sit up higher, my arms rest at my side and I move on a cushion of air with the road. It feels great!
Anything Else?
A couple of things are still coming up. There have been some small additions that I will cover later. Most notably I added a terrible, terrible power port, stuck some decals on the saddlebags and threw on some axle caps. All minor changes but worth discussing nonetheless.
 |
| Coming soon: How to nerd up your bike tastefully! |
Tuesday, March 15, 2016
My Review: Boom! Audio Cruiser Windshield Mounted Amp and Speaker Kit
Looking for a sound system was quite an involved process. The worst judge of sound is the human ear which became painfully evident as soon as I began to look for advice. Hopefully all the time I spent trolling forums, searching YouTube and discovering poorly labeled websites will save you some headache.
First and foremost, this review assumes you run a windshield on your bike or a fairing. If you do not have a windshield, stop now. I do not have enough information on handlebar speakers and I only intend to focus on windshield speakers.
Who is this system for?
It is important to note that this setup does not have any source. That is, there is no radio built in. All this system provides is a direct connection to the speaker via an AUX cord or what most people know as a headphone jack (3.5mm). Every phone and MP3 player, along with most tablets are equip with this universal port and all of them will plug right in.
This system is for those who want complete control over their music and have a variety of input methods. It is perfect if you prefer to use your smartphone or mp3 player to pump music into the system. And why not? With a capable device there is practically a limitless amount of music to listen to. Services like Pandora, Spotify and IHeartRadio are all viable options. Personally, I prefer to use those services mixed with a personal MP3 collection.
This system is NOT for those who just want a simple "turn it on and jam out to the radio" system. Because it lacks an always on source, some older people may not like it as much.
For the tech savvy this product will work fine.
How hard is it to install?
That depends on the bike and the wiring method. I can only discuss what I did with mine and by no means should it be a guarantee that it will work. The speaker itself mounts easily and quickly with provided hardware to the windshield. The amp unit mounts on the front tubes of the chassis with relative ease. The challenge is in the wiring. I used a fish tape to send the wires under the seat and gas tank to the front. I then purchased an adapter from Harley that would allow the system to use the AUX power under the seat. After, it was a simple matter of crimping the switch and hot wires into the adapter and done. The official instructions want you to tap into a relay on the electrical system which was not needed since we went to an aux input instead.
As with anything, if you at all doubt your ability to competently carry out this installation, pay the extra and have the dealer do it, or consult a mechanically savvy friend. It will save you time and headaches.
Overall this was around 6/10 with 10 being the most difficult and 1 being the easiest.
How does it sound?
The big question with lots of small answers. For my tests I used two sources; my cell phone and a new generation IPod Nano. I also ran the speaker in heavy traffic (25-40 MPH), on country roads (45-55 MPH) and on the highway (60-75 MPH). The results? Well it just depends.
When cruising around the city(25-40 MPH), the system had more than enough power to sound clear and crisp. The sound quality, no matter what song, was fantastic. I found a range of sounds from rock to rap sounded great on this system. The source made no difference either. Spotify and IHeartRadio sounded great. The only problem was with the encoding of some of my personal MP3s. Lower quality MP3s became distorted more quickly.
On country roads (45-55 MPH) I found that I needed to constantly adjust the volume. It would never become unhearable but it would frequently fade in and out because of the large gains in speed. This is to be expected and is not the speaker's fault. Essentially, I got the same results in this speed range. The speaker was loud enough to be heard but the clarity no matter which source began to become less clear. At this range the speaker was having a more difficult time producing bass notes that sounded clear. Indeed, at this speed do not expect rap or hip-hop to sound too good. Not horrible, but not fantastic bass. Rock and other genres that rely less on bass still sounded great.
The big question I had is the one I'm sure many of you have. After waiting around a month to test it out I finally hit the freeway in the almost-freezing temperatures this evening. I am happy to report that at highway speeds (60-75 MPH) the speaker holds up! Now, did it sound fantastic? No. Of course not. The speakers are simply not that powerful. It sounded acceptable as though you were listening to an MP3 clip on the internet in 1998. It was distorted but the music was still solid. Hip-hop and rap are going to turn a bit messy while other genres will be ok. It's all about that bass.
Really I was just glad that it was still loud enough to be heard when I hit 75 MPH. Impressive.
Other thoughts?
The system really shines for being somewhat affordable and easy to install. But the real added bonus to going this route is the hand controls. On the throttle side you must mount a control panel that includes power and a volume up and down button. This control option was what actually sold me fully on the system. Being able to control the sound without moving your hand off the grip was a great safety bonus for me. I was thrilled. I find it very handy so far and think it adds value to the price. To me it more than makes up for the lack of radio.
I run mufflers on my bike. They aren't as quiet as stock but they aren't as loud as drag pipes. I would say they are an acceptable amount of loudness for a residential area. I was able to hear the speaker clearly over the sound of the mufflers but I cannot guarantee that drag pipes will allow for the same quality.
Should I buy it?
As usual, it depends. I would absolutely buy it again. I was looking for a sound system under $600 that would sound good on roads and ok on the highway. There are a ton of options out there but this one in particular struck a solid balance in terms of sound quality, control, appearance and ease of installation. It is this balance that Harley has achieved with their Boom! sound system that sold me on this package. If I find some negatives or something goes awry with the system I will be sure to update this review and let you know. Otherwise, I would say give it a try!
You can find the speaker at The Official Harley Davidson Store.
First and foremost, this review assumes you run a windshield on your bike or a fairing. If you do not have a windshield, stop now. I do not have enough information on handlebar speakers and I only intend to focus on windshield speakers.
 |
| The clean look of the installed speaker. |
The Harley Boom! system is quite expensive. Compared to the EBay specials, this particular setup is costly. You can find the system online for the standard price of $399.95. This is the lowest I ever saw it and it can only be found at official websites or dealerships. Try as I did, I was unable to find it any lower or on any other auction sites. Understand when you go into this purchase there is no real way to save money. If you can live without it or are short on money, just don't buy it.
Who is this system for?
It is important to note that this setup does not have any source. That is, there is no radio built in. All this system provides is a direct connection to the speaker via an AUX cord or what most people know as a headphone jack (3.5mm). Every phone and MP3 player, along with most tablets are equip with this universal port and all of them will plug right in.
This system is for those who want complete control over their music and have a variety of input methods. It is perfect if you prefer to use your smartphone or mp3 player to pump music into the system. And why not? With a capable device there is practically a limitless amount of music to listen to. Services like Pandora, Spotify and IHeartRadio are all viable options. Personally, I prefer to use those services mixed with a personal MP3 collection.
 |
| The panel on the right side next to the throttle add control and safety. |
For the tech savvy this product will work fine.
How hard is it to install?
That depends on the bike and the wiring method. I can only discuss what I did with mine and by no means should it be a guarantee that it will work. The speaker itself mounts easily and quickly with provided hardware to the windshield. The amp unit mounts on the front tubes of the chassis with relative ease. The challenge is in the wiring. I used a fish tape to send the wires under the seat and gas tank to the front. I then purchased an adapter from Harley that would allow the system to use the AUX power under the seat. After, it was a simple matter of crimping the switch and hot wires into the adapter and done. The official instructions want you to tap into a relay on the electrical system which was not needed since we went to an aux input instead.
As with anything, if you at all doubt your ability to competently carry out this installation, pay the extra and have the dealer do it, or consult a mechanically savvy friend. It will save you time and headaches.
Overall this was around 6/10 with 10 being the most difficult and 1 being the easiest.
How does it sound?
The big question with lots of small answers. For my tests I used two sources; my cell phone and a new generation IPod Nano. I also ran the speaker in heavy traffic (25-40 MPH), on country roads (45-55 MPH) and on the highway (60-75 MPH). The results? Well it just depends.
When cruising around the city(25-40 MPH), the system had more than enough power to sound clear and crisp. The sound quality, no matter what song, was fantastic. I found a range of sounds from rock to rap sounded great on this system. The source made no difference either. Spotify and IHeartRadio sounded great. The only problem was with the encoding of some of my personal MP3s. Lower quality MP3s became distorted more quickly.
 |
| You can use an adjustable bracket to mount a pouch above the speaker. |
The big question I had is the one I'm sure many of you have. After waiting around a month to test it out I finally hit the freeway in the almost-freezing temperatures this evening. I am happy to report that at highway speeds (60-75 MPH) the speaker holds up! Now, did it sound fantastic? No. Of course not. The speakers are simply not that powerful. It sounded acceptable as though you were listening to an MP3 clip on the internet in 1998. It was distorted but the music was still solid. Hip-hop and rap are going to turn a bit messy while other genres will be ok. It's all about that bass.
Really I was just glad that it was still loud enough to be heard when I hit 75 MPH. Impressive.
Other thoughts?
The system really shines for being somewhat affordable and easy to install. But the real added bonus to going this route is the hand controls. On the throttle side you must mount a control panel that includes power and a volume up and down button. This control option was what actually sold me fully on the system. Being able to control the sound without moving your hand off the grip was a great safety bonus for me. I was thrilled. I find it very handy so far and think it adds value to the price. To me it more than makes up for the lack of radio.
I run mufflers on my bike. They aren't as quiet as stock but they aren't as loud as drag pipes. I would say they are an acceptable amount of loudness for a residential area. I was able to hear the speaker clearly over the sound of the mufflers but I cannot guarantee that drag pipes will allow for the same quality.
 |
| It's ride tiiiiiiimmmeeee! |
Should I buy it?
As usual, it depends. I would absolutely buy it again. I was looking for a sound system under $600 that would sound good on roads and ok on the highway. There are a ton of options out there but this one in particular struck a solid balance in terms of sound quality, control, appearance and ease of installation. It is this balance that Harley has achieved with their Boom! sound system that sold me on this package. If I find some negatives or something goes awry with the system I will be sure to update this review and let you know. Otherwise, I would say give it a try!
You can find the speaker at The Official Harley Davidson Store.
Sunday, March 13, 2016
Add a Dash of Frustration!
For two glorious days the weather of the midwest looked favorably upon Ohio and granted us 70+ degree weather. This sudden and unexpected gift created a frustration that was difficult to ignore. I had just ordered some additional parts for the bike assuming the weather was not going to be nice. Realizing I was a solid 6 days out from receiving these parts I decided to, uncharacteristically, display some restraint and not run to my uncles to take the bike out.
What the hell?
Trying to complete the black and white look of the bike was taking more time than I imagined it would. Everytime we added another small piece of black trim we then realized something else needed to be black. We decided after our last saturday wrenching session that two things needed to be blacked out; the horn cover and the dash.
 |
| Stretched out and cheap looking. |
The dash isn't exactly a large board. It's more like an instrument panel that sits on the tank and completes the look. For some reason the Road King takes a huge departure in terms of design from it's older brother. Gone are the "cat's eye" indicators and the small style dash. Instead, the Road King opts for a longer piece of pot metal, chromed and stretched down like a bib across the gas tank. It does not look terrible but feels like it doesn't belong on a Harley.
 |
| That is soo 1960's! |
As for the horn, well, it's a cover. It is chrome by default and is rubber mounted as it sits on the left side of the bike suspended between the two cylinders. By changing out this cover and the dash it was hoped that the black and white look would be complete.
 |
| Just the right amount of black on this side. |
The Easy Part
I always assume that buying the items is the easy part to every job. I was very mistaken. My uncle had ordered numerous black gloss powdercoated items from a man in Michigan. He said that this person did good work and shipped fast. I managed to track this person down and EBay and sure enough, he had lot's of stuff. I found the dash and the horn cover I needed and quickly purchased them. It is important to note that I purchased the dash on a Wednesday and the horn cover on a Saturday.
A few days pass and it's the weekend again. The dash had not shipped yet, which was odd, but I didn't really worry. Then on Monday I received an Email saying the horn cover had shipped and was given a tracking number. I was confused. If I ordered the dash on Wednesday of last week and the horn cover on Saturday, why wouldn't they both just ship at the same time? Further, why would the item I ordered later not ship later as well? I assumed that the seller had a problem receiving my payment so I decided to send an email to see if everything was well. Here is the answer I received;
 |
| Please Click to read and be as confused as I was. |
I have no idea what I did to warrant a rant like I got but it was really impressive. I don't understand why he would lie to me? Why tell me you just got off the road from a well deserved vacation but somehow manage to ship an item out a day earlier even though you weren't home. Even worse is that the shipping times are stamped from Michigan and during the day. Unless he traveled at light speed from Daytona in order to ship the horn cover, he is lying. I did not bother responding to him. Obviously someone who would lie about such mundane issues has bigger fish to fry.
I eventually got both pieces delivered by Friday so they would be ready for fitment on Saturday. Of course the dash had a scratch on it but I didn't bother emailing the seller. I'm sure he would have lots of reasons why it didn't have that scratch on it. Since I don't have any real repercussion (EBay always sides with the seller and often removes negative feedback) I decided the best way to protest was by not giving him any more of my money.
Never an Easy Job
My uncle was going to be a bit late but we decided to forge ahead without him. All that was remaining was to place two saddlebag inserts, insert two reflectors on the front bumper, tighten the highway pegs down, change the horn cover and change out the dash. That sounds like a lot but it only ended up lasting around 5 hours.
 |
| Fresh black plastic strips make the saddlebags look new again! |
The horn cover came off begrudgingly after I fought with the rubber mounting for a bit. Since it sits on a piece of rubber with a washer to absorb the vibration, I found it useful to have my wife hold the horn assembly in place while I turned the acorn nut with a socket. After that 3 simple bolts held it in place and it were easily removed and placed into the new one. The whole event was uneventful and took around 15 minutes.
 |
| The stock vs. powder coat. |
The endurance test came with the dash. Removing it from the bike is easy. Remove the screw and the acorn nut from the dash, lift slowly and as you life disconnect the 3 power jumpers that run into each part of the dash. There are 3 total, one for ignition, one for the speedometer and finally one for the instrument panel.
 |
| The naked tank. Notice all the wiring that is hidden under the dash. |
Once the dash is off you can remove the speedometer by gently pulling back on the three tabs of the black plastic ring holding it in. Once you remove those 3 tabs the speedometer will fall out along with the rubber ring holding it in place. Don't loose that ring and don't damage the speedometer.
Four small hex head screws hold the ignition switch in place. Simply remove them with a nut driver.
Finally, the instrument cluster. This is where the turn signals, bright lights and check engine are displayed. This took awhile. There are 4 tabs that you must use 2 pair of needle nose pliers on to slowly work upwards. While doing this it is wise to place a flathead screwdriver underneath the panel and slowly turn it, allowing the torque from the flathead to bend the panel upwards along with your pulling motions. It took awhile but we got it. Once the light housing is out we popped the panel out, filed it down to fit in the new powder coated dash and started the reinstall.
 |
| The end result. Not easily obtained. |
About one frustrating hour later we had the dash back on. There were many reasons why this took so damn long. First, the bolt that holds the top of the dash in place kept moving around on us. It's meant to, I understand, but what a frustrating experience. Second, the tabs that hold the cable harnesses into place weren't there, so we had to hold the wires in place while trying to place the dash on the floating bolt. To top it off the rubber gasket that protects the tank from the metal of the dash kept falling off. Oh, did I mention one of the ignition wires kept falling out of the ignition harness? I don't think I have ever seen 3 people sit around swearing in frustration like that before. Even my wife was pissed off.
That was it. The bike was ready for take off! Before we even put the tools away I turned it on and flew off for it's first ride in months. Was all the frustration worth it? Yes, yes it was. The look is complete and now I can't wait for the season.
 |
| The almost complete bike along with it's little brother. |
 |
| Coming soon: A better photo! |
Subscribe to:
Posts (Atom)